Digital Elevation Data
-
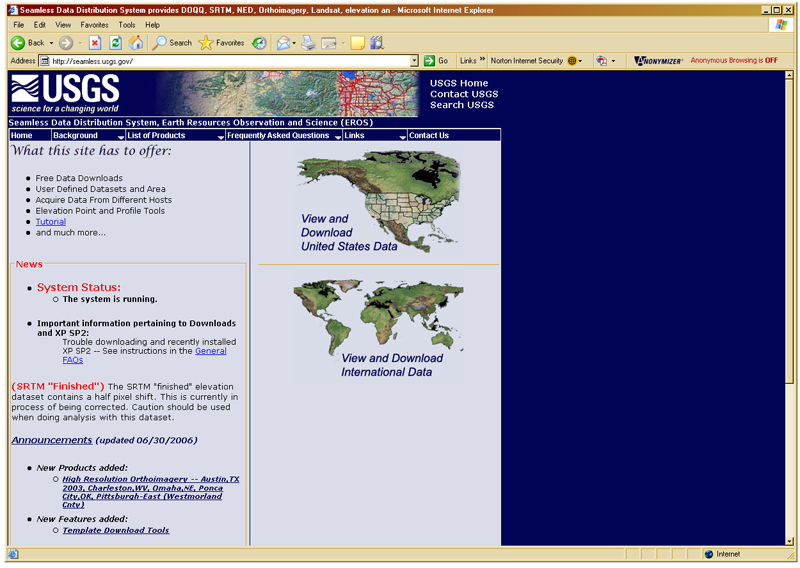
How to acquire NED, SRTM and Orthoimagery data from the USGS website
-
How to get them into ARCGIS and change the projection (e.g. to UTM)
-
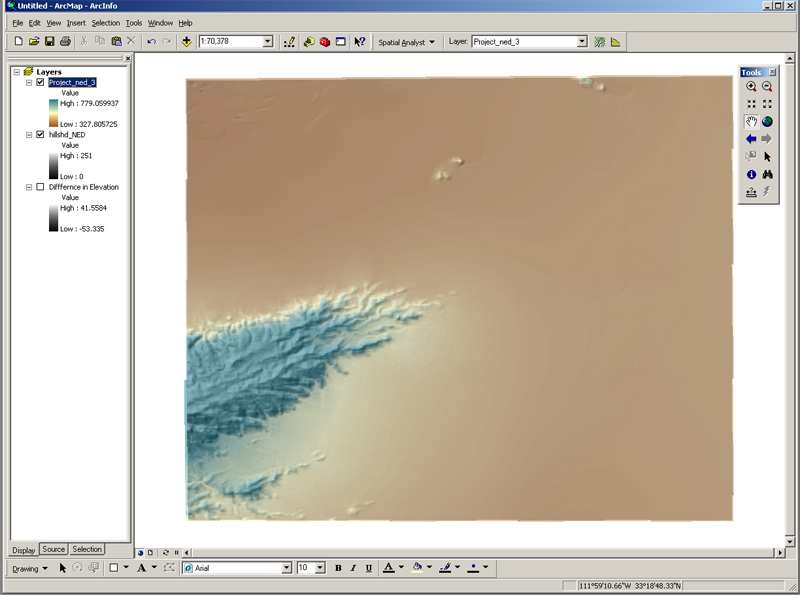
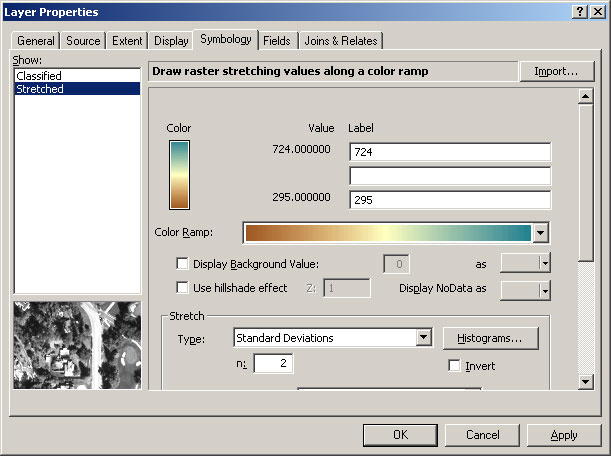
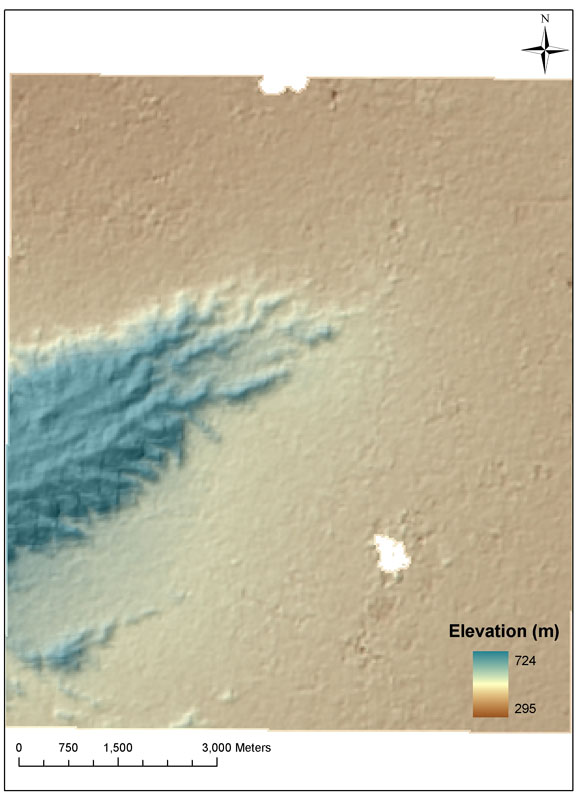
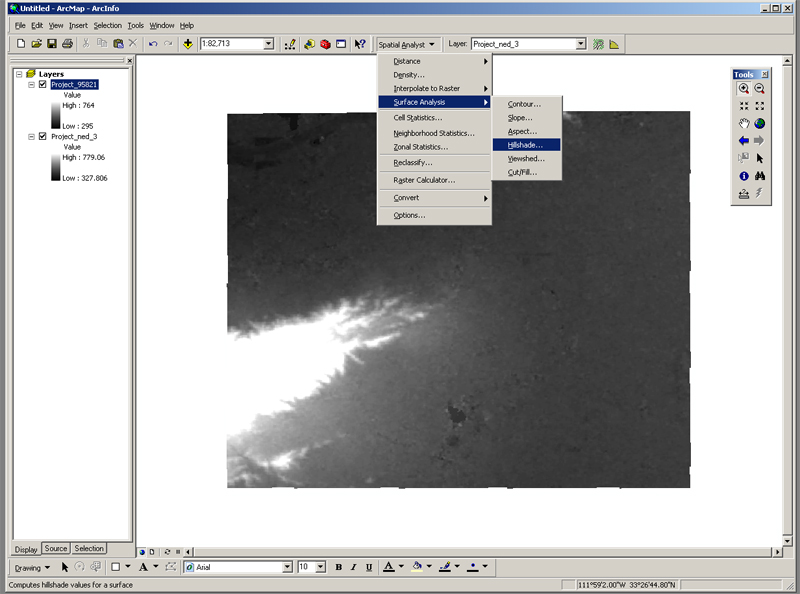
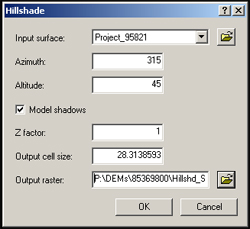
How to produce a hillshade map
-
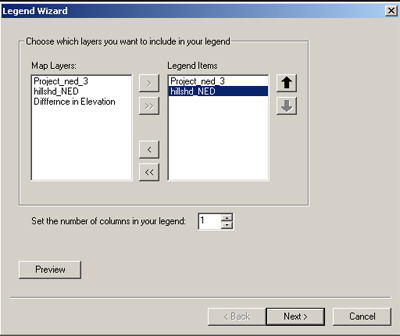
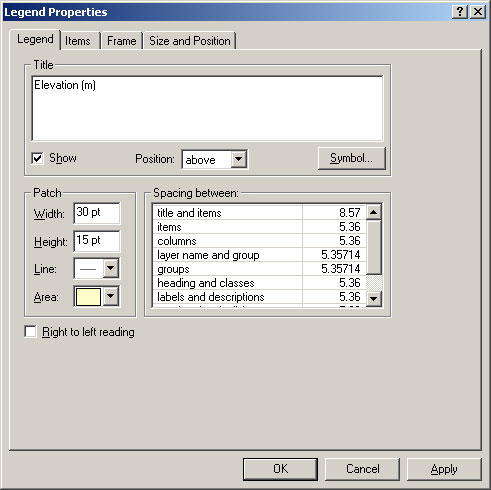
How to produce a simple (but nice!) map in ARCGIS
How to acquire NED, SRTM and Orthoimagery data from the USGS website
This is the home page of the the USGS Seamless Data Distribution System. The website provides all kinds of data, including National Elevation Data (NED), Shuttle Radar Topography Mission (SRTM) data of various spatial resolutions and ortho-rectified air photos (e.g. DOQQ). A pull-down menu on this site lists all the data sets available. Note also their tutorial: http://gisdata.usgs.gov/Website/Seamless/tutorial.asp |
 |
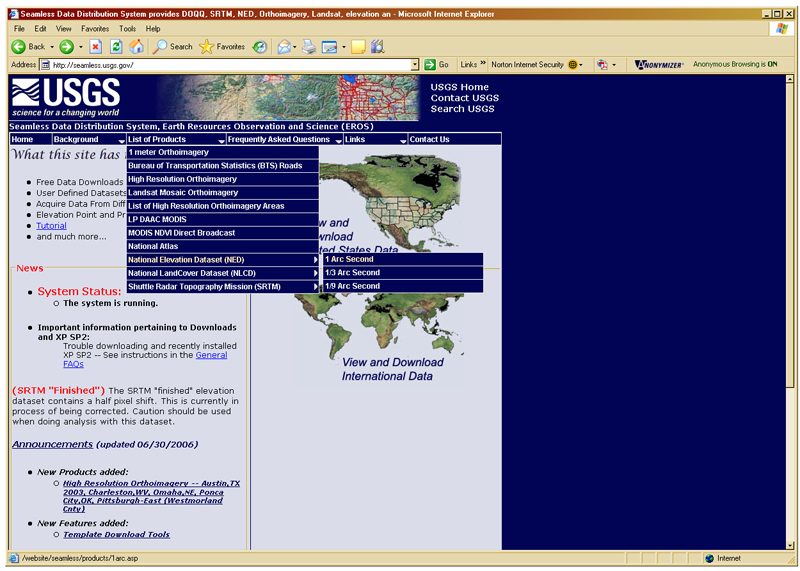
As mentioned, the NED are available in different resolutions. To get detailed information about the individual data sets, just go to the List of Products menu (here the 1arc second NED was chosen) and another window will open (next figure). |
 |
Here is all the information about the various data sets. In order to download them however, you have to go back to the main page (next figure). |
 |
Depending on the data you are interested in (national or international) you can select one of the two options
For our example, we use data from the US -one reason being the excellent spatial coverage and quality of the data. Also, some data sets are only available for the US (such as the NED...). |
|
Quite often it takes a little while to open this site -so try to be patient. As you can see on the right side of the map, there are two pull-down menus, right below the zoom bar. The first, called Display lets you choose which data you want to display. In the second one, you can select the data you want to Download. In both cases you just have to check the respective boxes in order to either display or download the data set. Right now the GTOPP60 Color Shaded Relief is checked and therefore displayed. On the left side of the map are tools that you will use to Zoom and to define an area that you want to get i.e. Download data from. |
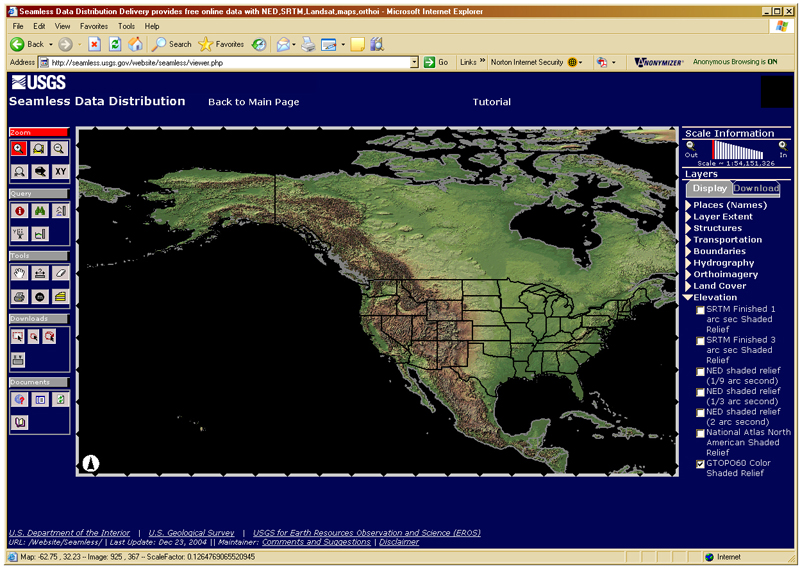 |
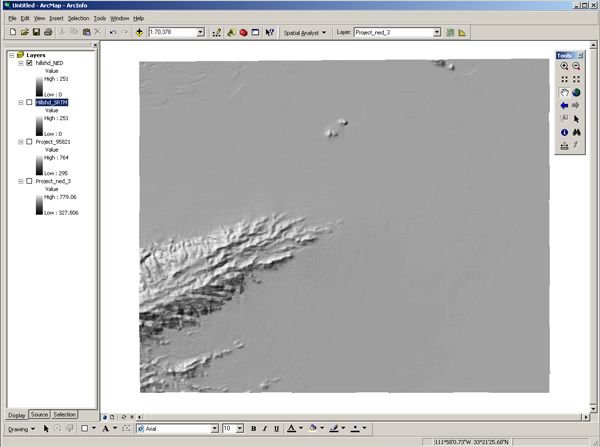
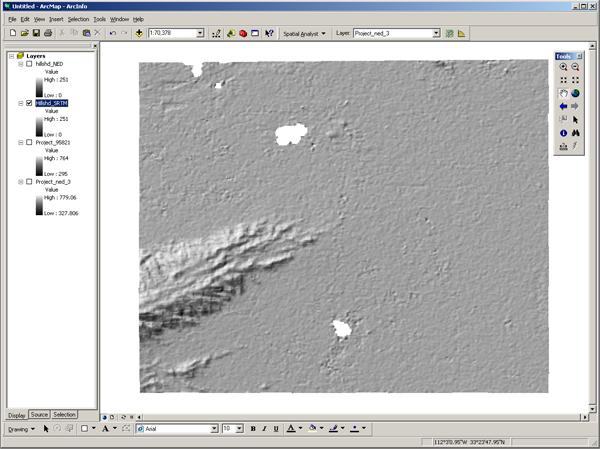
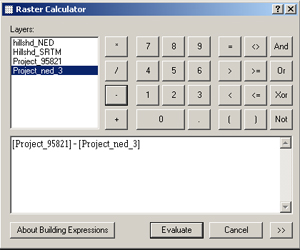
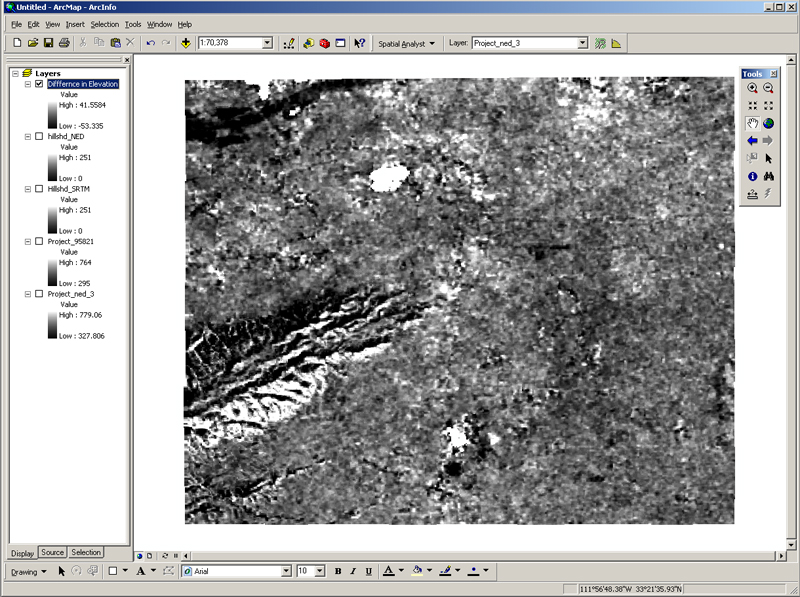
It is helpful to zoom in to the area of interest. An easy way to do it, is to select the magnifying glass on the top left of the map (is highlighted in red). Then just left-click on the map (hold the button) and define the area you want to zoom into -here it is Arizona. Depending on the area you are looking at, there may be a couple of data sets (e.g. elevation data) available. Normally, you would tend to get the highest resolution data, however, this might be impractical and just unnecessary, depending on the purpose that the data will serve. and the spatial coverage your are looking for. For our example here, we will zoom into Arizona and will obtain a 1arcsec NED and SRTM data to compare their differences. Remember that the 1/9arc sec data set will be 81 times larger then the 1arc sec data set, covering the same area!
|
 |
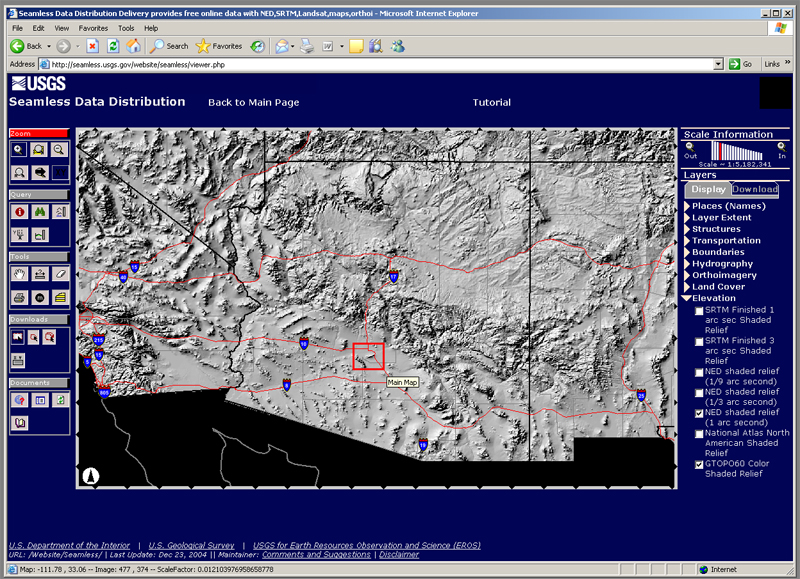
Zoom in a little bit more => to South Mountain and surrounding area |
 |
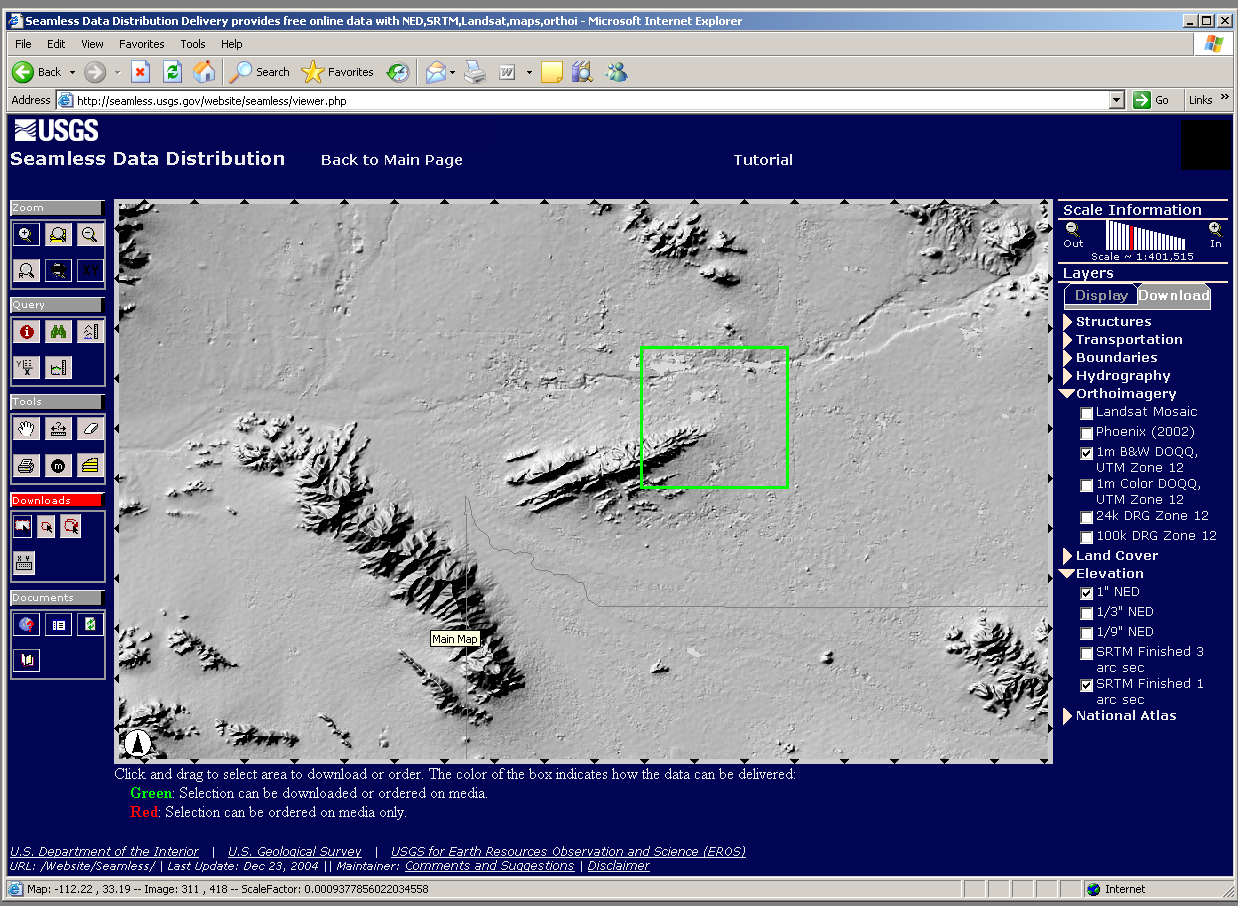
So, pick a data set that fits your purposes best. In order to download data, you have to do these two things: A) Change from the Zoom-tool to the Download-tool (both can be found on the left side of the map) -just select the Define downloaded area button. B) On the right side of the map, you have been in a pull-down menu called Display; to the left of it, it says Download =>select that menu and select in the Elevation option the data set you want to download (here we use the 1arcsec NED and SRTM Finish 1arcsec). Then switch to the Orthoimagery and select the data of you choice (we used 1m B&W DOQQ UTM Zone 12). Now you can go to the map and define the area you want to download -left-click and open a window. |
 |
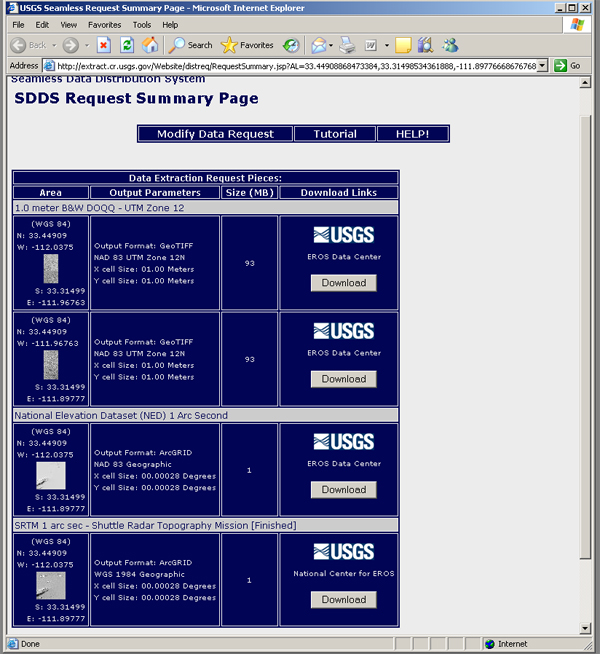
When you successfully defined the area of interest and the data your are interested in, this window will open which tells you a couple of things about the data you are about to get (the projection e.g. WGS84, output format, spatial extent, and such). As you may see, depending on the resolution and spatial coverage, you might have to download a number of files. Just click at the download button and another window will open telling you about the status of your request. That may take some time! If it is done, you merely have to save the data and that's it! |
 |
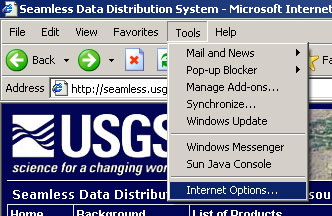
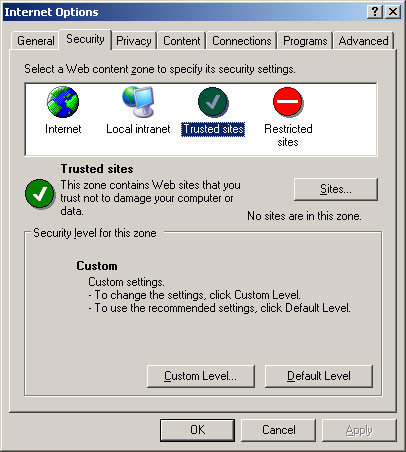
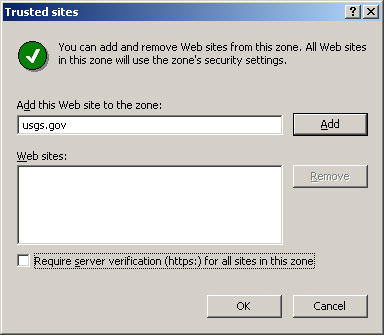
It may well be that the pop-up blocker on your computer doesn't allow you to down the file. In this case you have to change the internet options to make the USGS-site a trusted site. Just follow these screen shots (from left to right) to accept the USGS-site as a trusted site so that you can start to download the data.
 |
 |
 |
In case you have trouble with the downloads: sample data
1 arc second Shuttle Radar Topography Mission (SRTM) DEM: 58195259.zip
1 arc second National Elevation Dataset (NED) DEM: NED_02446943.zip
Digital OrthoPhotoQuaterQuad: 27431447.zip
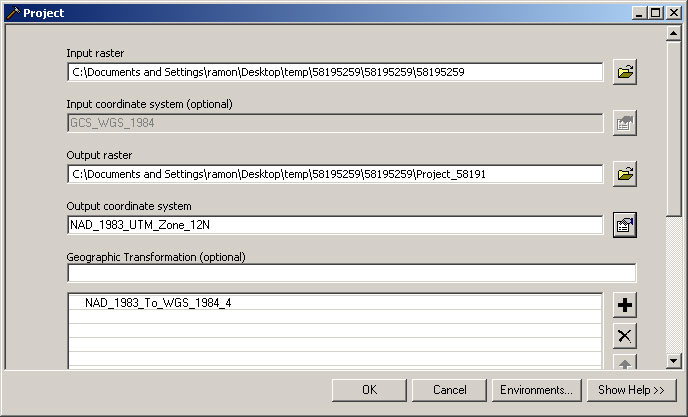
How to get them into ARCGIS and change the projection (e.g. to UTM)
-
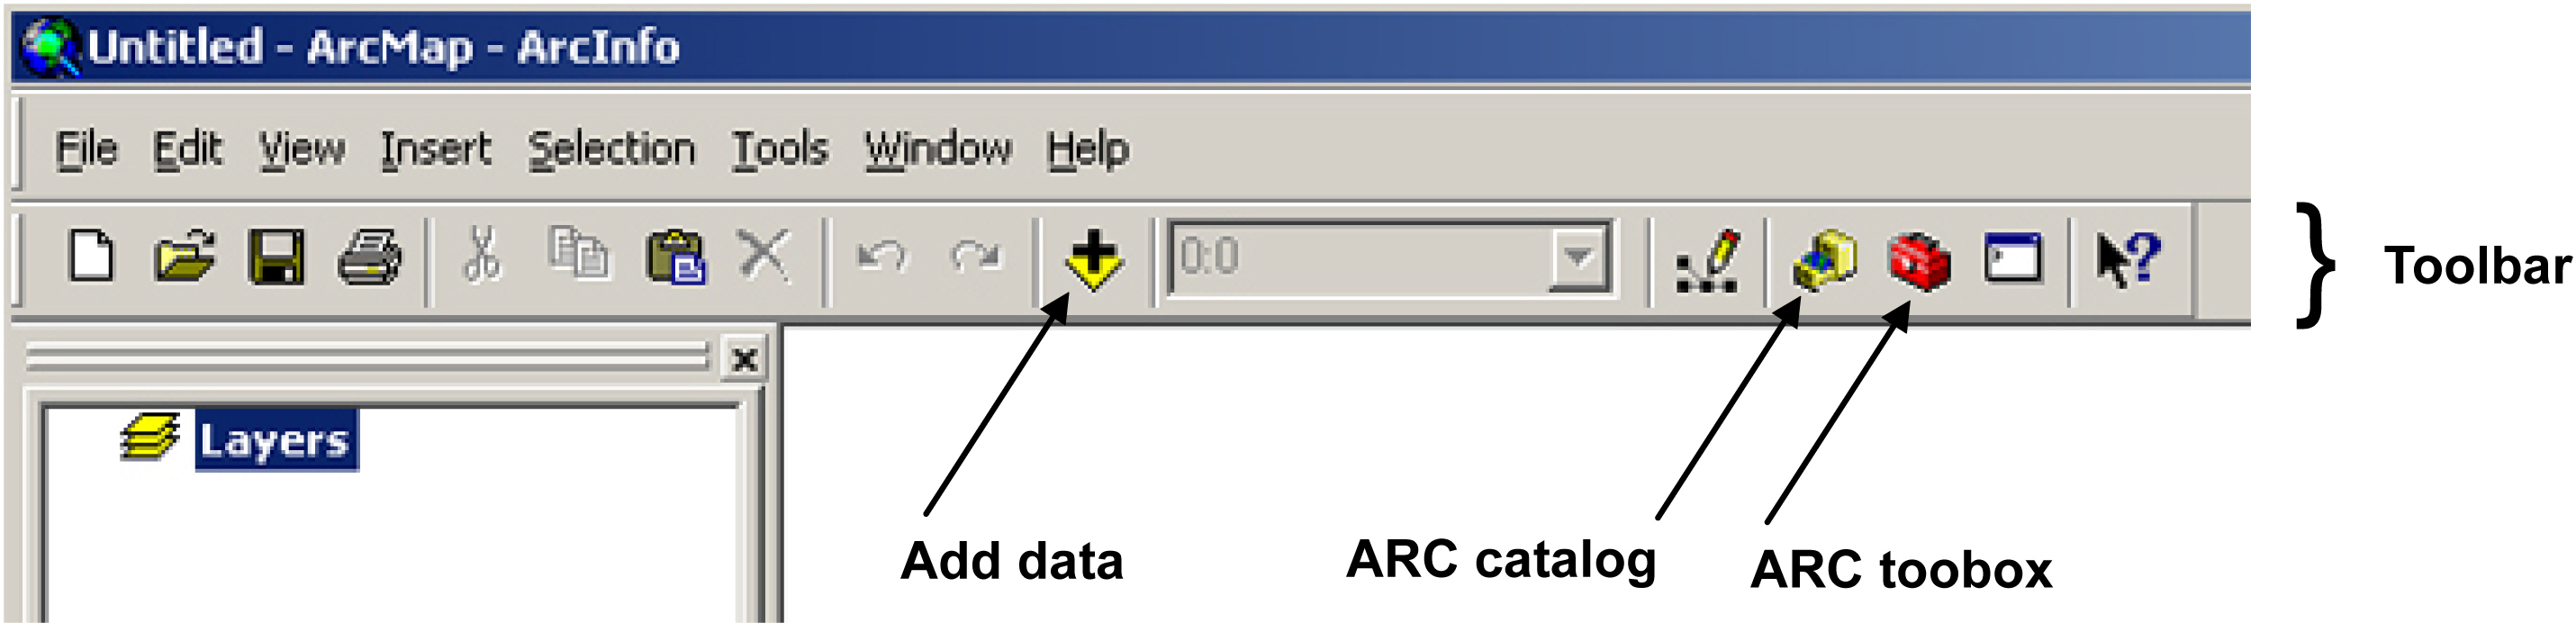
Unpack zipped files that you downloaded; then open ARCMAP and the following window will open
-
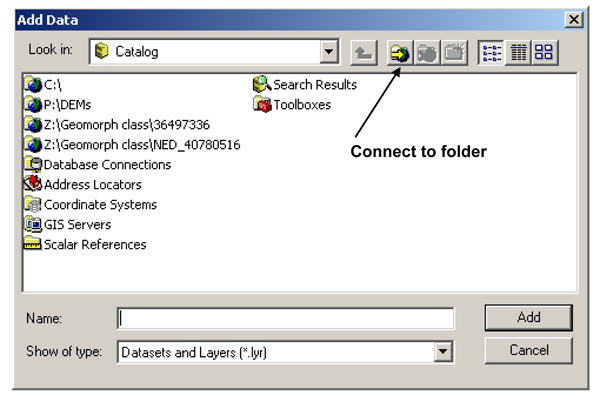
Push the Add data button and the following window will open. Use the Connect to folder button to browse to the location where you saved the (unzipped) data. When you press OK, you will see the folder that contains the DEM file in the 'Add data" window. Double-click it, select the file and add it.
 |
 |
-
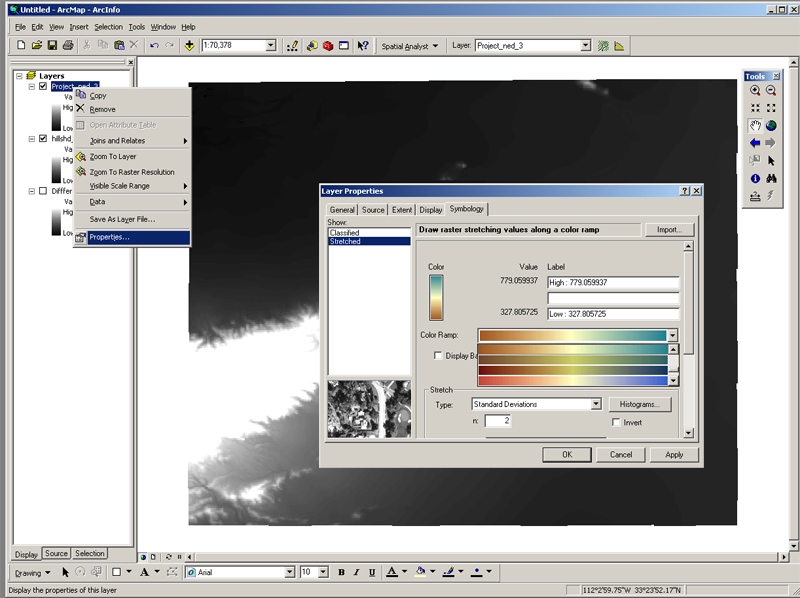
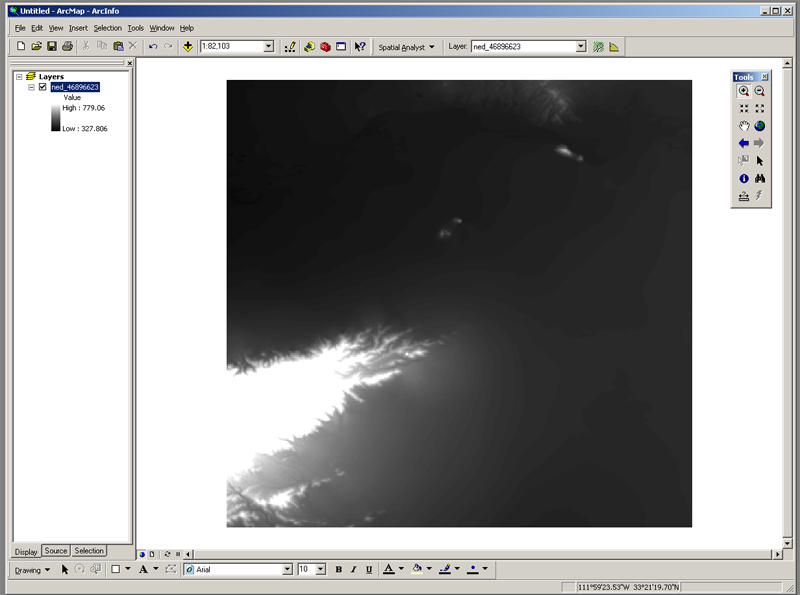
Now the DEM is in ARC!

 f
f