| Announcements |
Syllabus |
Schedule |
Weekly lecture notes |
Assignments |
Links |
Uploading your website to the ASU server (and some useful HTML links)
A small sidenote: We encourage you to look at the source code of this and any other web page.
You can use them as a guide: if you like a certain feature, take a look at the source code and modify it so it
fits your needs. In general, reading source code is easier when it
is written by hand instead of a web design program. Also, we highly recommend that you indent your HTML code well to make
is easier to read and debug because you will easily recognize the hierarchy of your commands.
As an example, take a look at the source code of this web page to see what we mean.
This web page was created to help you get started with the ASU server. We provide a couple of links to tutorials
for HTML scripting. The site is actually more of a link parade than anything else. We will begin by guiding you through
the process of activating your ASU web space. You can get all the information on the ASU website and we will direct
you to the necessary sites as well as comment on some points along the way.
Activate your personal ASU web space
- Go to http://www.asu.edu/asurite
- Enter your ASURITE ID (probably the same username for your ASU email).
- It will probably tell you that you've already activated your ID. If not, follow the steps to activating your ASURITE ID.
- You will find five brown boxes at the bottom of the page. Click the middle box that says "ASURITE Account Management
Subscribe to additional computing access/services".
- The next page displays subscription options for several ASURITE services. Select the following option:
- Personal Webpage Hosting.
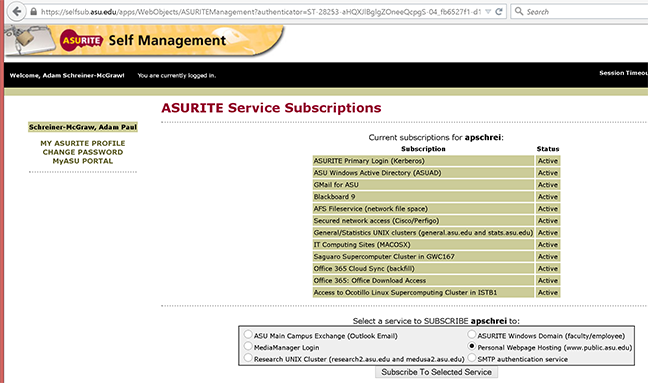
- Click the "Subscribe To Selected Service" button.
- A list of the ASURITE services you are about to subscribe to will be shown. Click "Subscribe Me Now" to finalize your request.
- You will be directed back to the ASURITE subscriptions page after your request has been finalized.
Accessing your personal ASU file space
There are two ways to access your personal ASU file space: (1) via the "My Files" utility, and (2) via a secure file transfer client. The latter requires downloading special software.
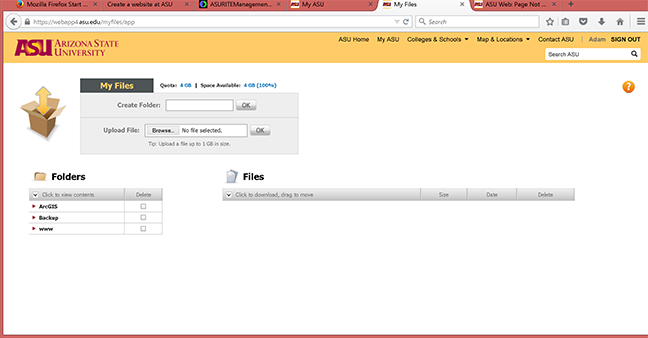
Using the "My Files" utility
This is probably the simplest way of accessing your personal ASU file space. Go to your My ASU page
http://my.asu.edu and click the "My Files" link under Quick Links. This will take you to your
personal ASU file space where you will upload materials for this course.
Using the Secure File Transfer client
If your are interested in a more advanced option for accessing your personal ASU file space (and learning a little bit of Linux
on the way), use this option. All ASU computers should already have a secure file transfer client installed. Otherwise (or if you're using
your personal computer), download the secure file transfer client ("SSH" for Windows users, "Fetch" for Macintosh users)
- Windows users: Download SSH from http://myapps.asu.edu.
Here, you can also download and use a large selection of software available for free as long as you are enrolled at ASU. This is where part
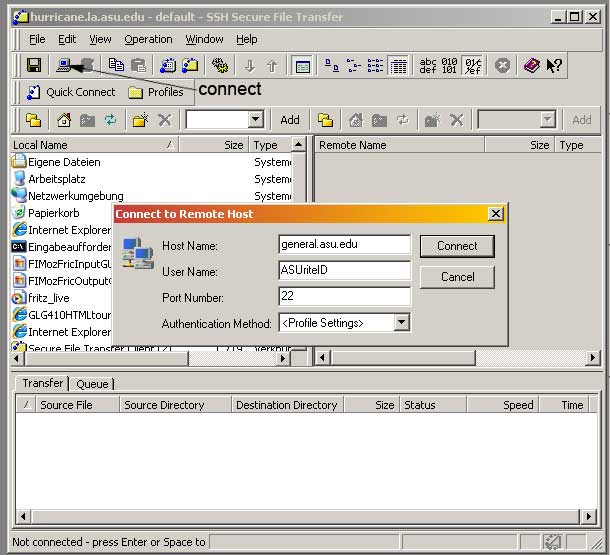
of your ASU technology fee goes! Search for SSH for Windows, download, and install it. Start the SSH Secure shell => Secure File
Transfer Client. You will notice two panels. The left panel is your local computer (i.e. the computer you are using at the moment). The
right panel is the computer or server you are trying to connect to. Click "connect" or "quick connect" (see figure below). Enter the
name of the computer or server that you want to connect to. Recall that your ASU web space is located under "general.asu.edu". Login
using your ASURITE ID and password. In the right panel you should see two folders named "Backup" and "www". Everything you want to put on your website goes into the "www" directory.
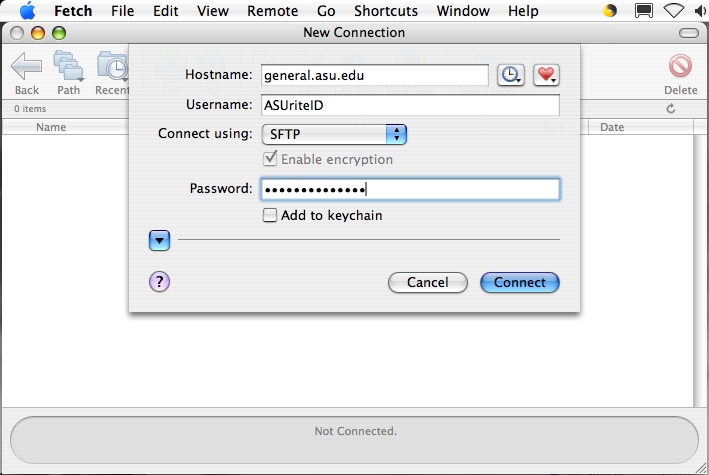
- Macintosh users: Go to http://myapps.asu.edu and search for "sftp". The first thing that comes
up is a package called "Fetch". Download and install it. Start Fetch => Secure File Transfer Client. A "New Connection" automatically starts.
Next to "Hostname:" enter the name of the computer or server that you want to connect to. Recall that your web space is located under
"general.asu.edu". Next to "Username:" enter your ASURITE ID. Below that, next to "Connect using:" select "SFTP". Then enter your ASURITE
password next to "Password:". At the bottom, click the "Connect" button. You are now looking at the files on that server. You should now
see two folders named "Backup" and "www". Everything you want to put on your website goes into the "www" directory.
Some useful links to HTML tutorials
Now that you can upload data (i.e., a website) to your personal ASU space, you should begin building your website. The nice thing about
scripting your website manually using HTML is that you only need the most simple text editing program. DO NOT USE Microsoft Word or a HTML editor!
Here are a number of links that will help you script in HTML. We actually made significant use of them to help build this page :-)
Page written by David Haddad and Ramón Arrowsmith with some items borrowed from Olaf Zielke.
Last update, August 25, 2015